1327 East 75th Avenue • Anchorage, AK 99518
phone 907.336.3617 • fax 907.336.3616
email nccountertops@gmail.com


KITCHEN PLANNING GUIDE
North Coast Countertops offers a variety of educational tools to help you choose the best stone options for your home or office, as well as learn more about our company and process.
Visit the following pages to learn more!
•
•
•
•
•
Countertop Fabrication Process
•
A Guide to
Kitchen Island Designs & Layouts
NORTH COAST COUNTERTOPS IN ANCHORAGE, ALASKA
KITCHEN PLANNING GUIDE
Countertop Guides & Articles
A GUIDE TO KITCHEN ISLAND DESIGNS & LAYOUTS
Whether it is a remodel to your existing kitchen, a renovation, or you are building your dream kitchen in your dream house one of the major design features to consider is the size, shape, and functionality of your kitchen island. The kitchen island can add an element of style, not to mention provide additional storage, seating, and workspace.
How to Design an Island for Your New Kitchen
As you are designing your ideal kitchen layout, whether it is a remodel to your existing kitchen, a renovation, or you are building your dream kitchen in your dream house one of the major design features to consider is the size, shape, and functionality of your kitchen island. The kitchen island can add an element of style, not to mention provide additional storage, seating, and workspace.
It may seem that your kitchen size or layout would determine the island that would best “fit”. We are going to start at the basics though, considering how you use your kitchen on a daily basis. Whether you use the space for entertaining, feeding the kids, or testing out your culinary skills, you are guaranteed to take a liking to one of the six most common island types. Let’s take a closer look at the typical styles, the perks of each and the possible drawbacks. The information contained in this article will aid you in designing a kitchen island that fits with your lifestyle.
Island Layouts L-Shaped Island
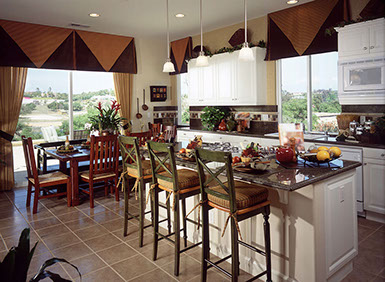
If you have a large open space in your kitchen and are looking for a generous workspace, storage capacity, and seating, an L-shaped island may be the right style. With the corner in the L-shaped island, you can add a lazy susan style attachment in the cabinet to maximize your storage space. If you are looking to add an appliance or two to your island, this style is a nice fit as well.
The key advantages of an L-shaped island are:
Large in size
Generous storage capabilities
Plenty of workspace for an avid cook or multiple cooks
Room for bar style seating
The possible drawbacks to the L-shaped island:
Due to their size and square lines, this type of layout can chop up your kitchen design, hampering your workflow.
Sharp corners can create a boxed in look and also decrease accessibility around the rest of the kitchen.
Island Layouts U-Shaped Island
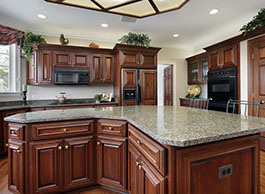
This style also lends itself well to a large open kitchen space. With a U-shaped island, you still have a generous amount of workspace, along with the opportunity to storage and seating.
The key advantages of a U-shaped island are:
Very spacious.
Largest and most accommodating of all island types perfect
for storage, workspace and room for seating.Ample space for housing one or more appliances.
With an appliance in the island, the chef has plenty of workspace
surrounding the appliance for prep or clean up as needed.The possible drawbacks to the U-shaped island:
The size can also be the largest downfall, without a large kitchen space this island style can quickly overwhelm your kitchen.
Due to the large size, without careful planning, the U-shaped island can also close your kitchen off from the rest of your home if you are aiming for an open concept feel.
Similar to the L-shaped, with the corners to maximize storage you would want to feature a lazy susan or swing out device for storage, otherwise you have dead space.
Island Layouts GALLEY Island
The stone is then cut using either a water jet or a bridge saw. Historically, the bridge saw has been the favored tool, however in recent years the “saw jet” which is a combination of a water jet and saw has come into play.
The bridge saw cuts with a diamond segmented blade, and cuts at a feed rate of approximately 7 feet per minute. The water jet cuts with high pressure water with garnet particulate suspended in the water at a feed rate of 1 foot per minute. You are probably asking, who would cut with a water jet? The benefit of the water jet is that it can cut circles, radius’, or any intricate pattern, where the bridge saw cuts only straight lines.
Recently, a more specialized tool has come to the marketplace. A saw jet, which has a saw head and a water jet built into it. You program the saw jet with the parts you need cut, it then determines where to use the water jet and where to use the saw, giving you the best productivity of both worlds.
Once the pieces are cut from the large slab, those pieces are forwarded to a CNC machine and with the help of a vacuum lifting system, the granite countertop pieces are then fabricated.
Island Layouts circular Island
In this phase of the stone fabrication, the cutouts for your undermount sink, cooktop, or holes for faucets are all made. The first step is cutting the stone to approximately 1/16 of an inch of its final size. Then, the CNC (Computer Numerically Controlled) machine is programmed to know the size of the stone or stones on the table. You can put multiple pieces of stone on the table and work on them together. The CNC machine is then programmed to know where the stones are located and what to do to each of those pieces. Since every stone has different working characteristics, it is key to have an experienced and knowledgeable CNC machine operator. It is truly a job where artistry and technology meet to produce the optimal finished product. Some stone materials require the CNC machine to move more slowly, some require stone to be entered in a certain way. Without this industry experience, the fabricating process may not produce the best end result we are looking for as consumers.
Once the holes are cut in the granite the edge is shaped by the CNC machine before the countertop is taken to final polish. There are a variety of stone edges to choose from, but the versatile CNC machine can produce any edge you select. For more information on the variety of edges, please see our article.
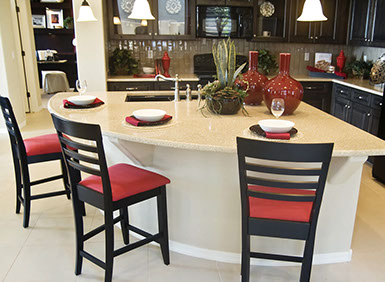
Island Layouts rolling Island
This step is specialized and may not be done by all stone fabricators. When you cut out the templates, you end up with a few stones that have thin rails of granite, for instance behind or in front of a sink or cooktop. By nature, those thinner pieces are not as strong as a larger surface area of stone. In the early 2000’s Great Lakes Granite and Marble conducted a study to find the best method for increasing the flexual strength of stone, specifically to reinforce this thin area. They tested various methods, working with the Marble Institute of America, and found the threaded rod technique described below to be the most effective.
In this step, rod slots (grooves in the granite) are cut and threaded rods are inserted into these grooves and encapsulated in high strength epoxy. When this process was studied, it was determined that this step increases the flexual strength of the countertop in that area by 400%. We should never be standing on our countertop, but I know I’m guilty of doing it to reach things in that high shelf, you wouldn’t want your stone cracking because this important step has been left out.
It bears mentioning that natural stone is extremely strong, approximately five times more than concrete. Even though different stones have various working characteristics, once installed in your home, the stone will likely outlive any kitchen you install it in. Understanding these characteristics and working within them during fabrication is key to ensuring your finished project is made to stand the test of time and use.
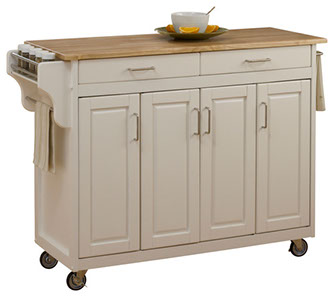
Island Layouts furniture style Island
We are approaching the end of the process here, polishing the stone. When the granite arrives to the fabricator from the quarry, the face of slab is already polished. Typically the granite face is not polished or changed at the fabricator’s shop. What does need polished, however, is the edge. Recall during the fabricating step the CNC machine created the countertop edge you selected for your project.
Regardless of the edge, it will now go through a 7 step polishing process. The industry standard is to use diamond polishing pads of increasing grit from 50 to 3,000 to polish the edge. Think of sandpaper in increasing grit to visualize how this process works. The CNC machine first starts with a diamond polishing pad of 50, then 100, 200, 400, 800, 1500, ending at 3,000. The CNC shapes and polishes at the same time, leaving the edge shaped and polished. Similarly, if your granite is ever scratched or damaged, this process is used to repair it.
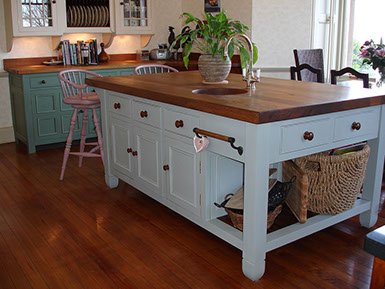
Design Style for the Island Layout You Have Selected
You have done the hard work – selected the layout that not only meets your kitchen size and layout but your practical needs and style as well. Let’s explore a few design features that will impact not only the look of your island and overall kitchen, but your workflow as well.
Countertop Riser
This style features one countertop level for appliances and/or food prep and another level for seating. The seating level can be shorter (table height), or taller (bar height). This may be a nice feature for the busy cook who also enjoys entertaining. You have the opportunity to cook, prep, and clean, while visiting with your guests yet they are somewhat separated from the food prep.
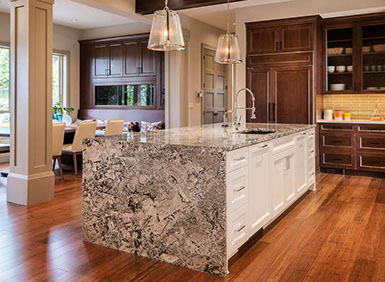
Waterfall Edge
Bring the countertop granite or quartz material down the side and you have a kitchen island with a waterfall edge. This waterfall design is an effective way of adding interest to the most basic of spaces.
Countertop Surface
Some individuals elect to go with a complementary style on the island rather than the same countertop. How do you select the look that is right for you, you ask? Approximately 85% of people will use the same countertop as the rest of the kitchen. Stainless steel or butcher block are other options worth considering. You can even use a different edge style on the island as the rest of the kitchen to make it appear larger.
Function of the Island
How you intend on using the kitchen island is completely up to you. Just keep in mind your main reasons for introducing the island, which might be to provide the kids with a space to do their homework, to create a space for additional kitchen amenities, to conceal clutter, or to complement existing materials and fixtures.
Storage Needs
If maximizing storage is your goal, you may want to consider wrapping your cabinet design around the island to offer storage on all sides. As mentioned above, the style of the island will weigh into how much storage you are able to have. Think about what you want to store out of sight inside the island and what you want to store clearly. Open shelving is perfect for providing extra leg space.
Seating at the Island
How many people would you like to provide seating for? The generally accepted industry standard is 24” of width per person for seating. However, for maximum comfort, we would recommend 30” per person, especially if they will be dining at the island. Countertop overhang at the island is also important when it comes to seating. Normal overhang length is 12” and is generally the same depth as that of a snack bar or cocktail bar. Keep in mind that the normal overhang length does not provide enough space for legs before they are hitting the base countertop. For optimal dining, 15” overhang is recommended.
Appliances in the Island
Counter space is always a premium in any kitchen, and placement of your appliances is key to maximizing your remaining counter space. If your island style is large enough, you can place a sink – either the primary sink or a smaller bar style sink in your island. Another option is your cooktop with a vent or hood placed in your island.
Since a kitchen island serves so many purposes, your design choices should not be made lightly. An interior design icon of the 21st century, kitchen islands can make a huge difference to the way you prepare meals, entertain, eat and everything in-between. So long as you pay thought to the way in which it will match your kitchen layout and consider your options in terms of countertop materials, sizes, and appliances, you can rest assured that your kitchen island will serve its function well.
